Creating a pipeline
Pipelines are the instructions a node uses to run the network. They can be created in several ways, but all creation methods start the same way.
First, press the Add button in the upper-right corner.

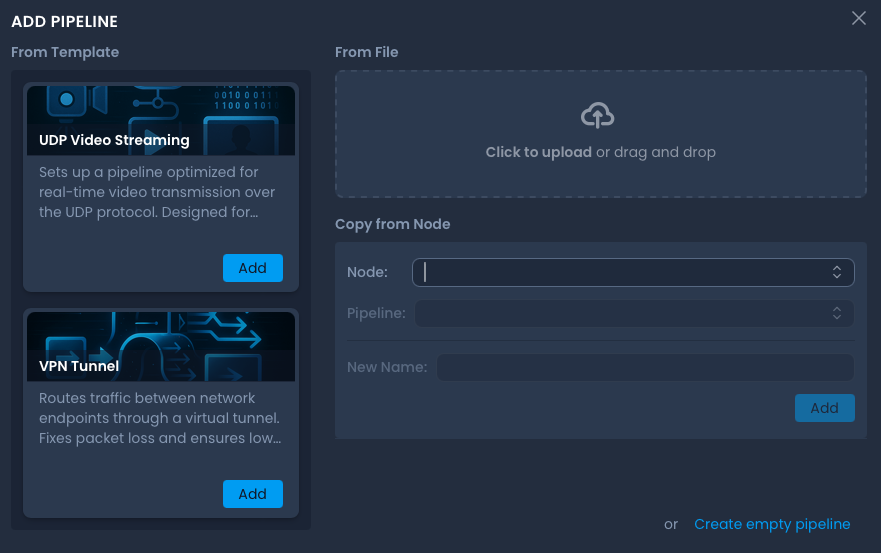
You will then see the pipeline creation screen, where you can choose between the options described below.
Continue to the section that fits your use case.
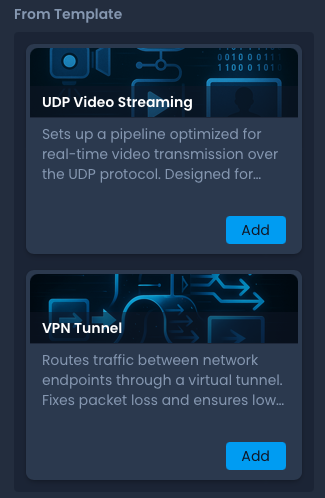
From Template
-
Choose one of the available templates. You will then be guided through a short setup flow.
In this demo, we’ll choose UDP.
-
The first screen is an introduction explaining the purpose of the selected template.
Press Next to continue.

-
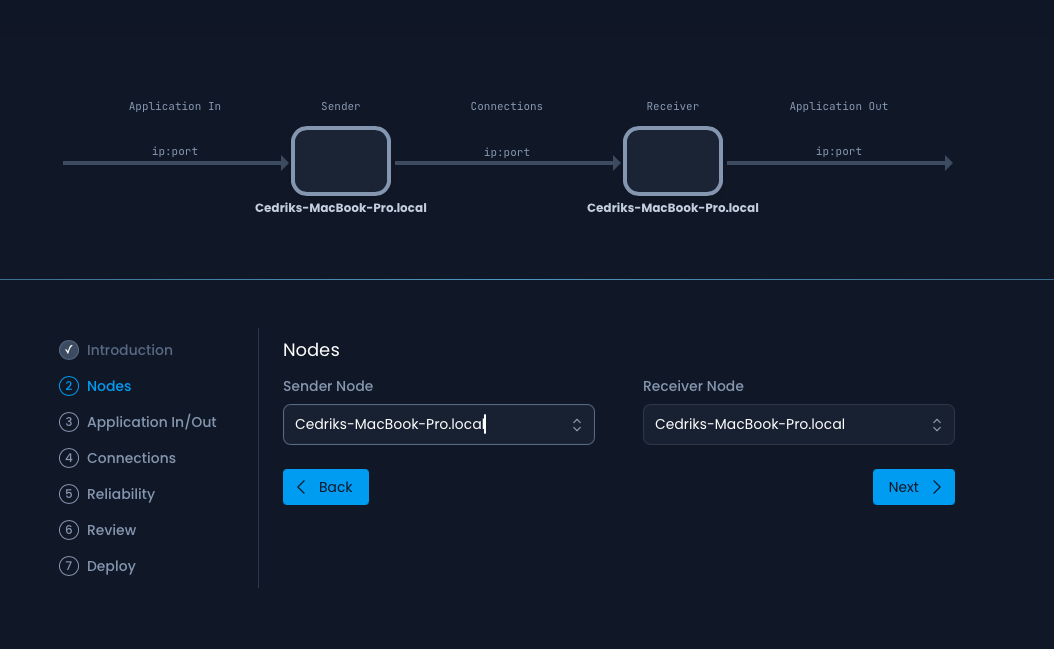
In the Nodes screen, choose which nodes you want to create the pipeline on.
In this example, we select the node running on the local PC.
If you haven’t set up a hub, you can read about it here: Hub.
If you aren’t connected to a hub, only your local node will appear.
-
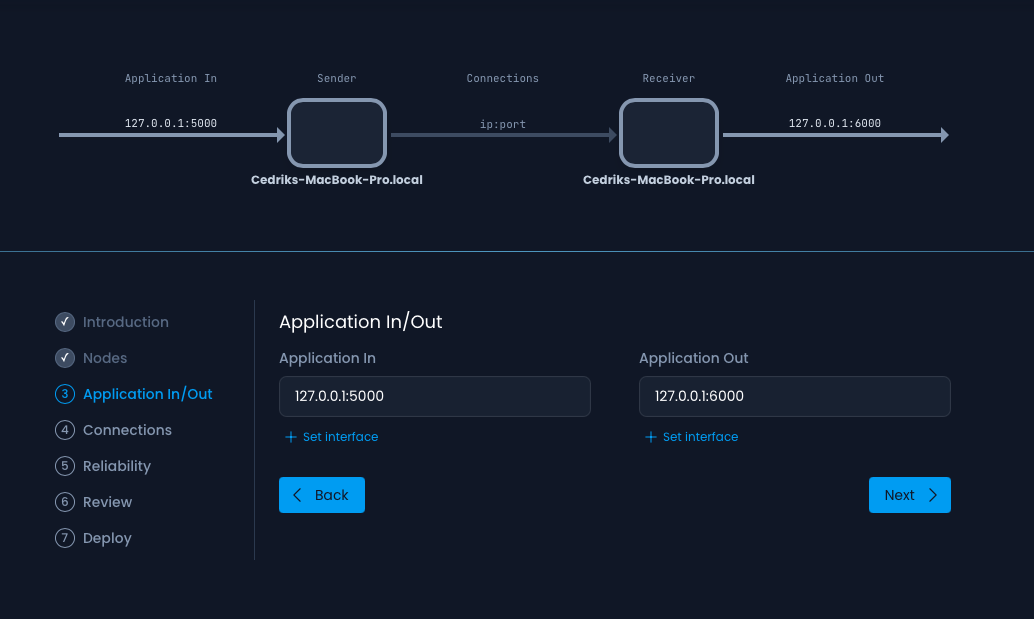
In the Application In/Out screen, configure where the UDP stream should be sent and received.
Here we use the local machine, so we use the loopback address.
You may choose different addresses depending on your setup and network interface.
-
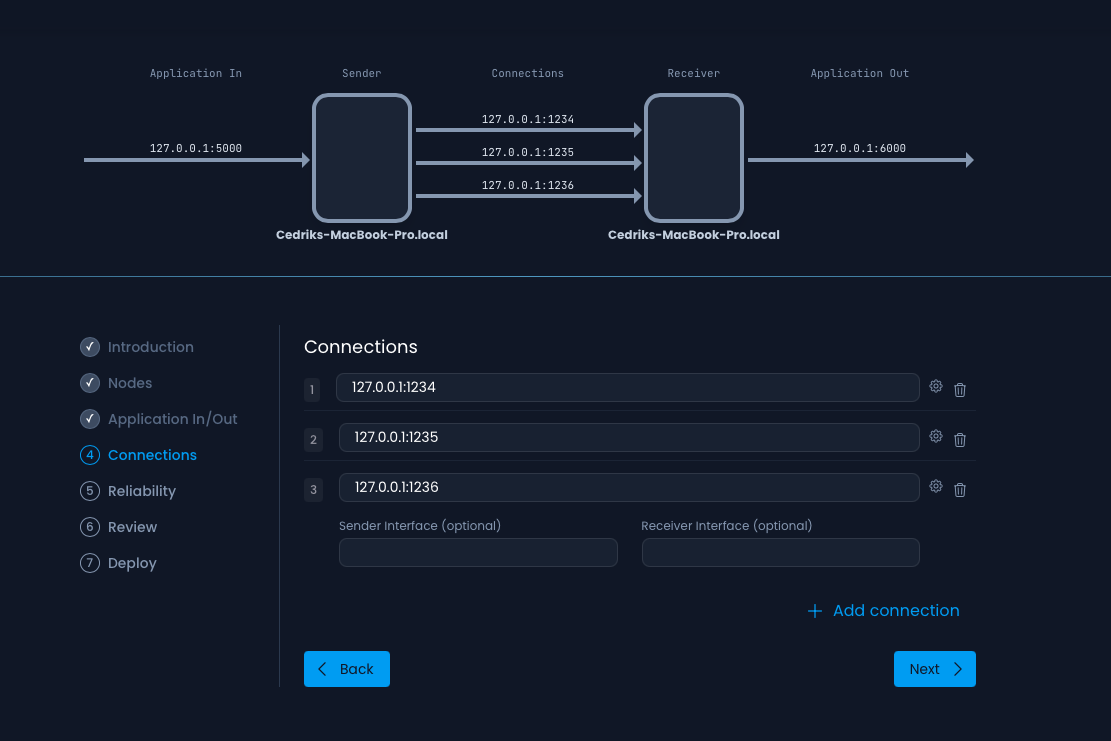
The Connections screen defines the addresses and ports used for the RAFT connections.
You can add as many as needed. In most cases, you want one connection per network interface you plan to send traffic over.
In this example, we use a MacBook with only one network interface, so this is for demonstration purposes only.
You can also add a network interface in Advanced Settings.
-
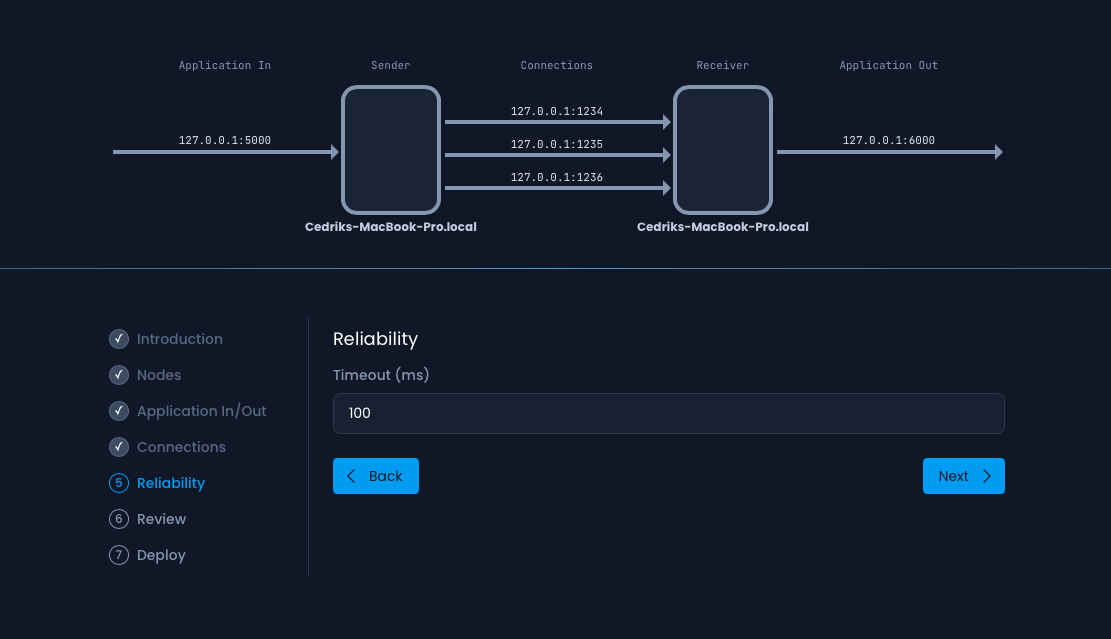
The Reliability section defines the allowable network latency.
This value must be higher than the actual link latency, otherwise data will not pass through.
-
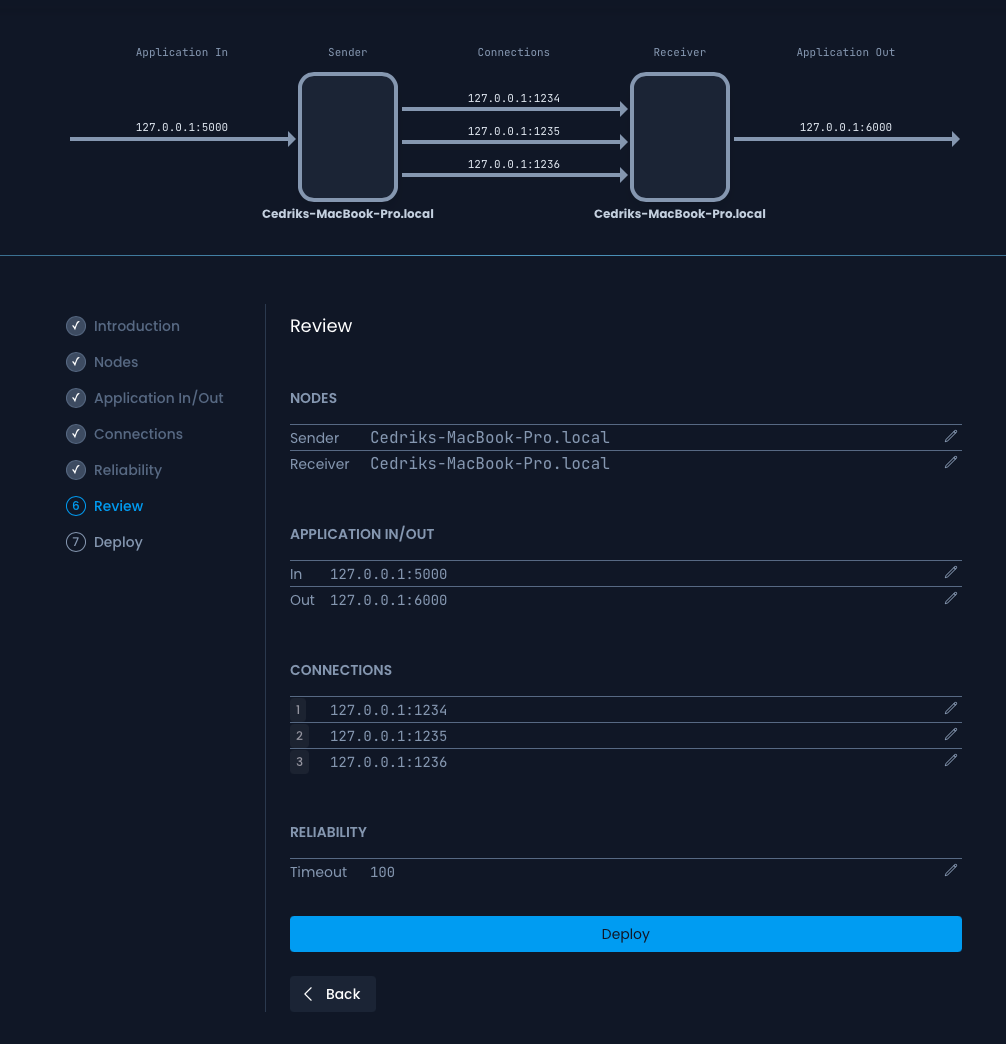
Review your configuration. You can return to earlier steps if you need to make changes.
-
Press Deploy to create the pipelines.
After deployment, you will see links to the newly created pipelines and a button to start both.
You have now created two pipelines.
You can view them here: Example of pipelines.
From Scratch
-
To create a pipeline from scratch, press Create Empty Pipeline.

-
You will be taken to the diagram editor, where you can mix and match components as needed.
Learn more in the components section, and see examples here: Example of pipelines.
From Node
This option is used to copy pipelines across nodes.
- Fill out the form as shown in the example below:

Example of pipelines
Below are two screenshots of pipelines generated using the UDP video streaming template:
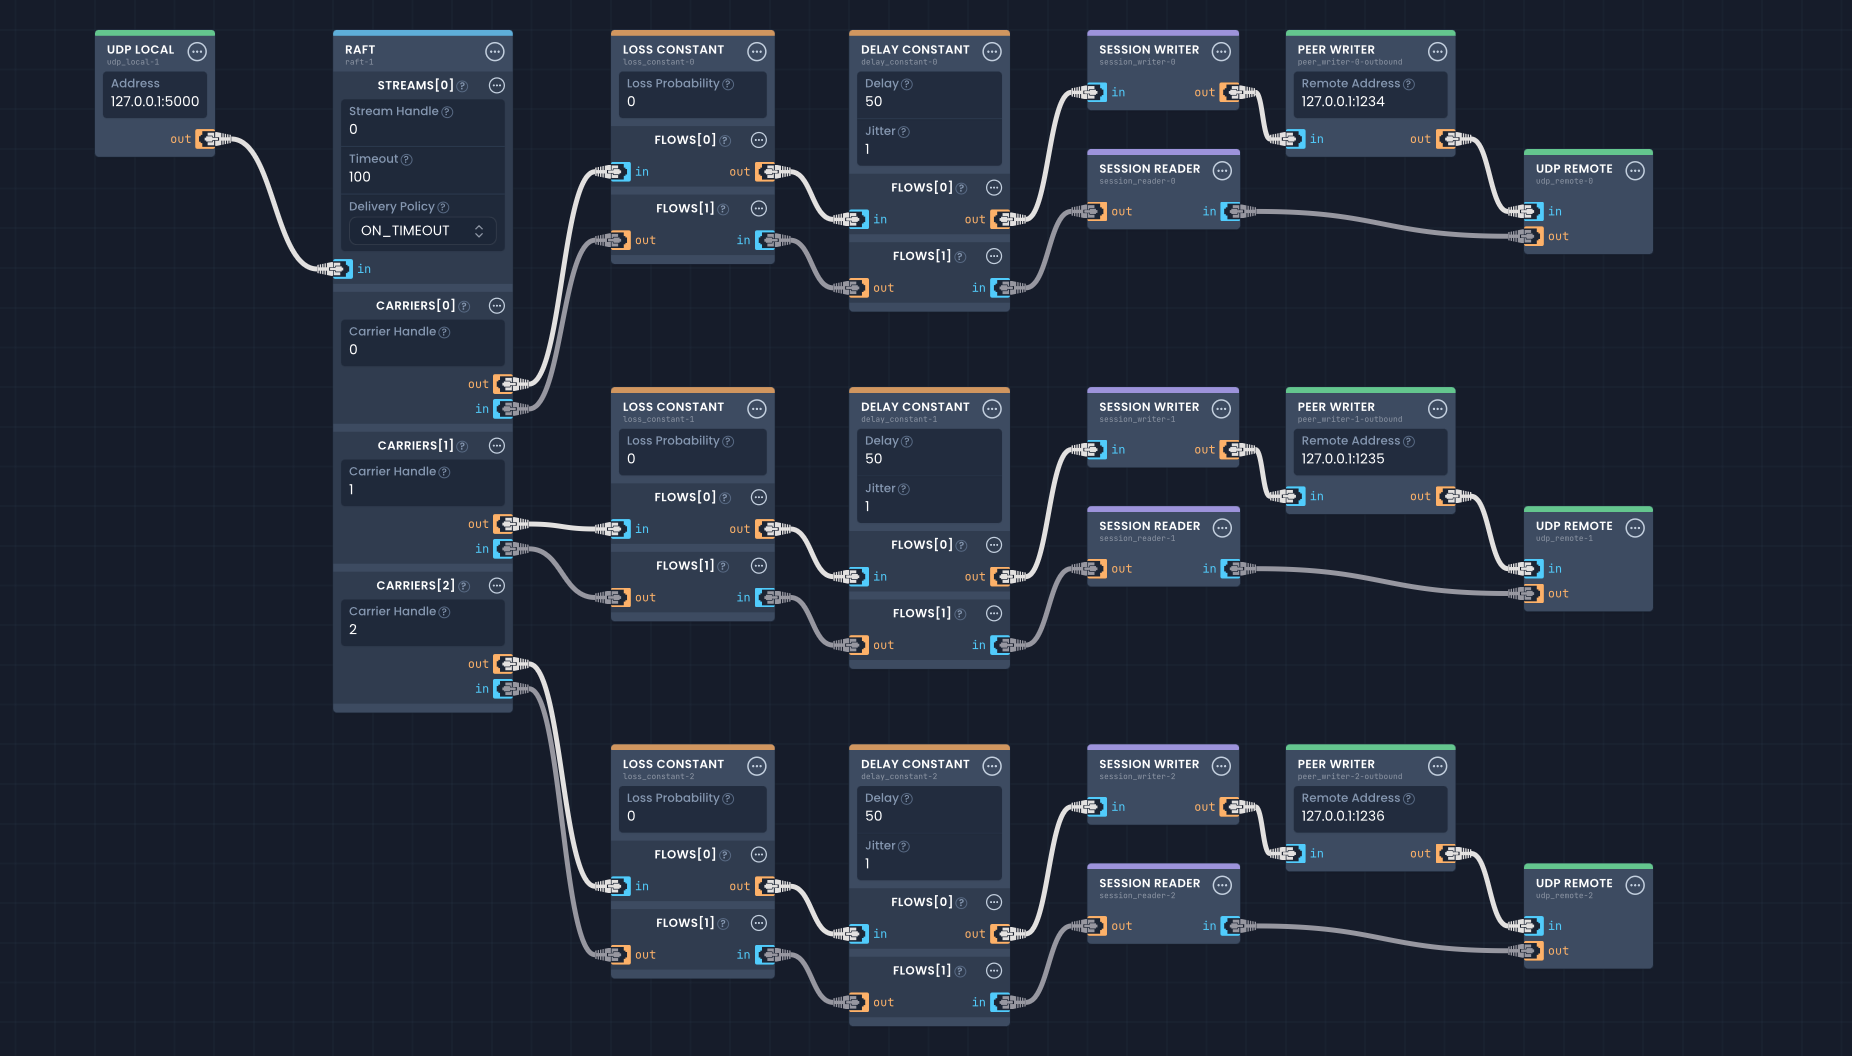

For details on the different components, see the Components section or check out our Reference Setups. You can also setup KPIs for your new pipeline—refer to the Quick add KPI guide. You can also checkout json-schema to see how a diagram is put together in the code.