Templates
Using the Pipeline Template Wizard
To streamline the setup process and reduce configuration time, the application provides pipeline templates that allow you to get started quickly and efficiently.
Getting Started
-
Navigate to the Pipelines Page
Begin by accessing the Pipelines section within the application interface. -
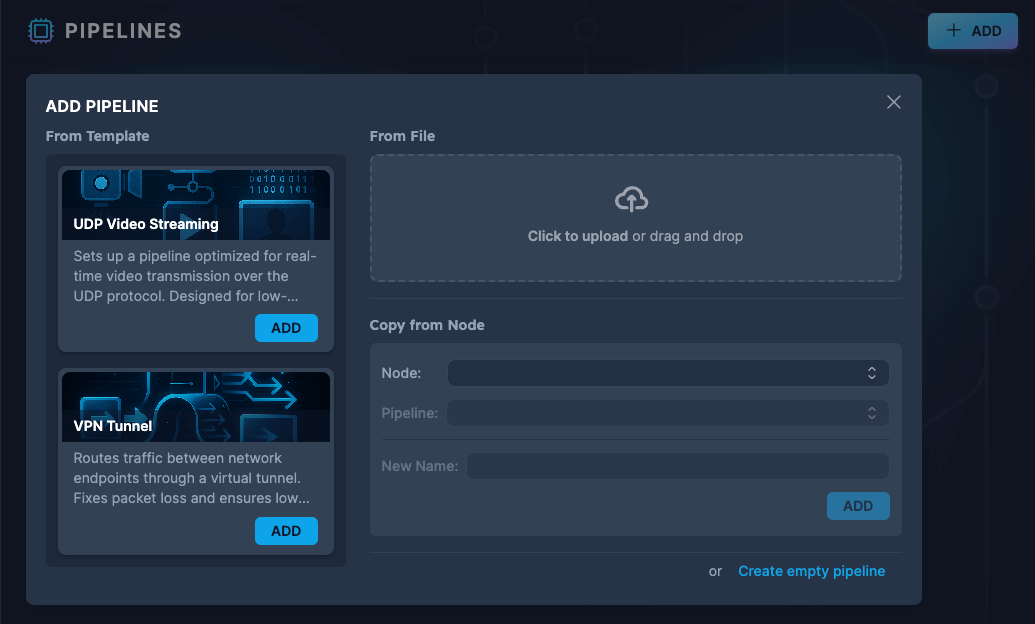
Launch the Template Wizard
Click the Add button, and select one of the available pipeline templates from the list. This action will initiate the Pipeline Template Wizard.
Guided Setup Process
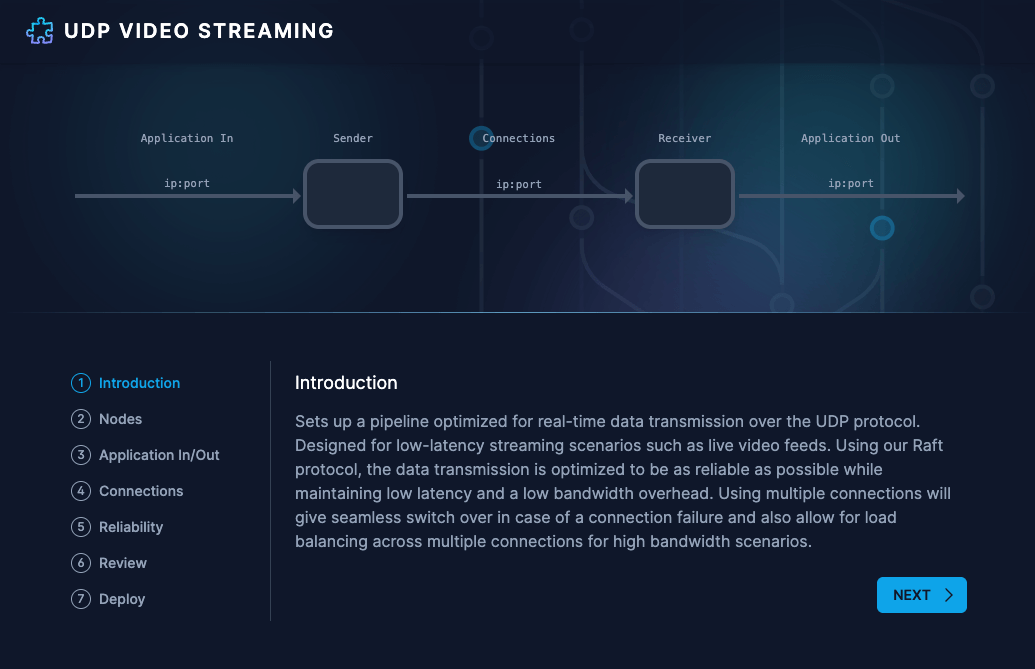
The wizard will guide you through a series of configuration steps necessary to instantiate and deploy the selected pipeline template. Each step is clearly delineated and includes:
- Concise Descriptions: Each input field is accompanied by a contextual explanation of what is required. These inputs may include node selection, connection endpoints, reliability settings, and other configuration parameters, depending on the specific requirements of the selected template.
- Visual Overview: At the top of the wizard interface, a visual schematic is displayed. This live illustration updates as you progress, helping you conceptualize the pipeline topology and understand how the components connect.
Finalization and Deployment
Once all required inputs have been provided:
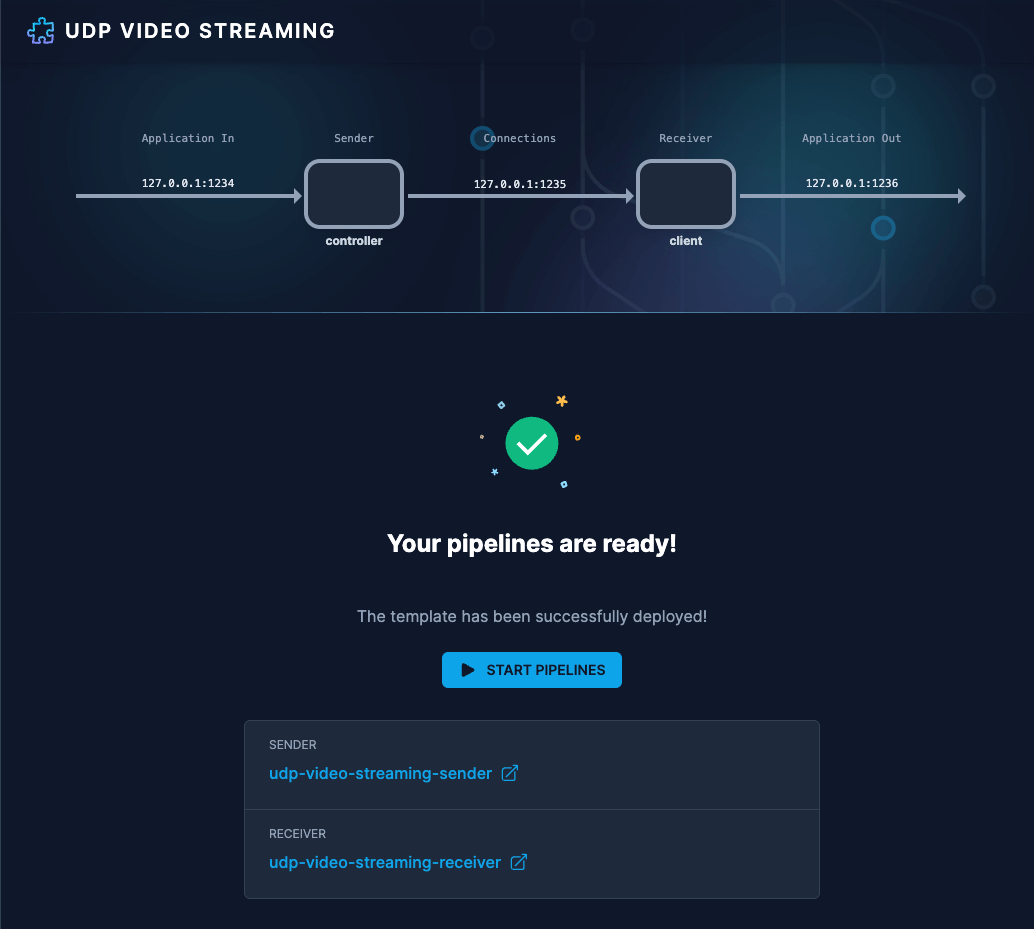
- You will reach a summary and confirmation step where you can review the configuration details.
- Click Deploy to roll out the pipeline to the selected nodes.
- Upon successful deployment, the pipelines are immediately available for activation. You can start them directly from the UI.
Ready to Operate
With the pipelines deployed and started, your system will be fully configured and ready to process data as defined by the selected template. You can now monitor, manage, or further customize the deployed pipelines via the pipeline pages.